Monday, March 14, 2011

Just Like An Egg On Stilts

....and two years later.

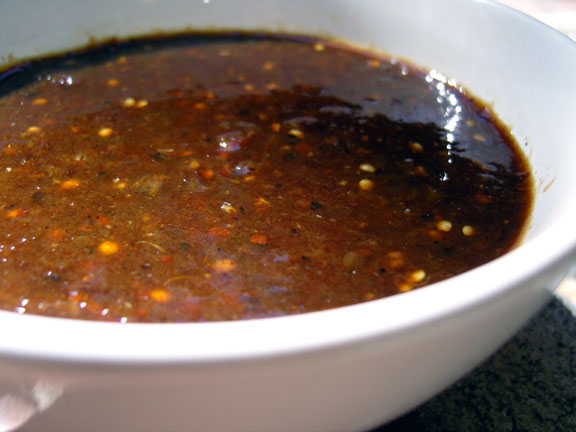
I have a fascination with people's food phobias, especially when they're bigtime foodies and even more so when they happen to be a critic and food writer.  I was reading a blog talking about Jonathan Gold and something he said in the article really bothered me.  The writer asks him, "Is there anything you won't eat?" His reply, "Scrambled Eggs." Of course, this totally blew me away because of my fondness for both him and eggs. (to make matters worse, he goes onto say that he also has an aversion to peanut butter sandwiches - ouch -though, he hasn't tried my favorite, peanut butter, raw cabbage and Huy Fong Chili Garlic Sauce, grilled on fruit-nut bread)

Dear Jonathan,
Please reconsider the egg.  I admit that scrambled eggs are not my go to when faced with other egg choices, but to abolish them completely based on some childhood aversion is silly.
You're a full-grown adult and you are known as one of the most adventurous and erudite eaters of our time.  
Let's move past this and give eggs another shot. 
Possibly, something like the following recipe I found on MarthaStewart.com. 
I even jazzed it up a little for you.
Sincerely,
Marc

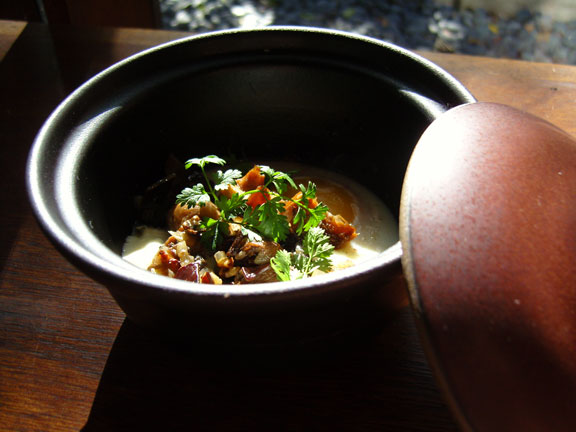
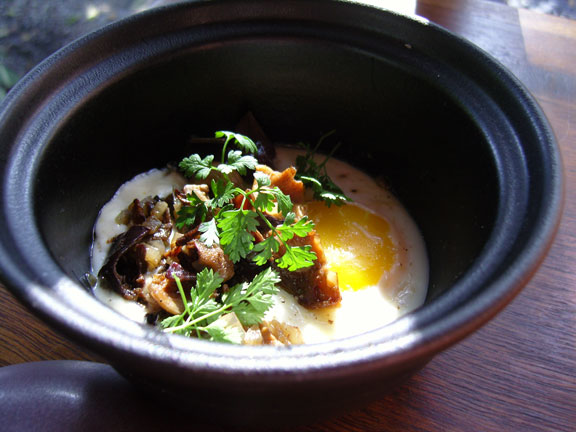
Coddled Eggs with Wild Mushrooms and Creme Fraiche
adapted from Martha Stewart Living
Serves 4

Ingredients
1/4 cup creme fraiche
4 large eggs
smoked sea salt and fresh ground pepper
12 ounces assorted wild mushrooms
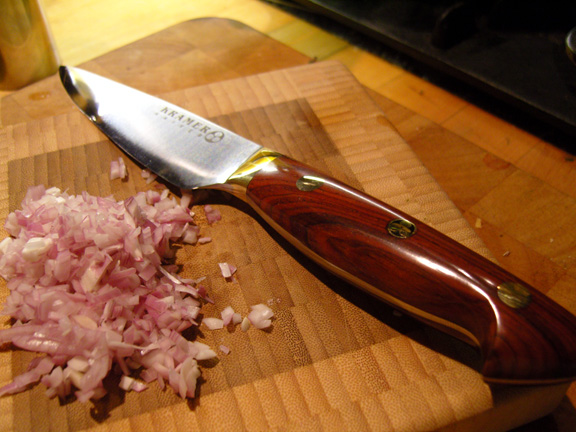
1 med shallot, minced (or green garlic if in season)
1 tbsp unsalted butter
fresh Mitsuba or fennel fronds

Preheat oven to 375 degrees. Put 1 tbsp creme fraiche into each of 4 oven-proof small ramekins. Crack one room temp egg into each ramkein, season with smoked salt and pepper. Place ramekins in a baking dish and place on oven rack. Fill baking dish with hot water about 3/4 way up the sides of the ramekins. Bake eggs uncovered until just set - about 12-14 mins. Whites firm, yolks runny.

While eggs are baking, heat olive oil in a large skillet over med-high. Add mushrooms, turning once or twice until tender - about 5-6 mins. Add shallot and or green garlic and cook until softened - 2 mins. Take off heat and add Shao Hsing wine. Return to heat and cook until almost all the liquid is gone - about 1 min. Stir in butter and season with salt and pepper.

Carefully remove the hot ramekins from the baking dish using a spatula and oven mitt. Divide the mushroom mixture into the 4 ramekins and garnish with the mitsuba and fried garlic if desired.

Monday, January 5, 2009

WINTERLONG - LAKSA


In our household, we eat plenty of hot soups and stews during the winter months.  One reason is that our house is freezing, which may seem crazy since we live in Los Angeles, but it's true.  I grew up in Northwestern Pennsylvania, so I'm accustomed to the cold.  For some reason though, the cold of our house affects me differently.  Enough so, that sometimes I have worn socks, pants and a hooded sweatshirt to bed.  Well, you get the idea.  A hot bowl of soup helps the situation immensely, and if you commit a small bit of time, you can easily prepare enough to freeze for a couple dinners later when your time is short and you're feeling cold.  

Along with soup, another benefit of the winter season is pumpkins and winter squash.  Delicious, satisfying, and easy to prepare, pumpkins can find their way into more dishes than you would think.  Roast them and add them to salads, pasta dishes, macaroni and cheese, dips, and in this case, soup.  Sweet or savory, roated or steamed, riced or mashed.  Very Nutritious.  Plus, they keep well as long as you don't cut them open.  Nature's perfect packaging.

This brings us to the soup, Laksa.  Laksa is a southeast asian soup that has many forms from region to region.  Some are coconut milk based curries and others are more of a sour fish stock made with tamarind.  All are spicy and contain some kind of noodle.  The variations from there can include anything from pineapple, cucumber, sprouts, tofu, chicken, fish or hard-boiled egg.  I used Nigel Slater's recipe from "The Kitchen Diaries" with some adjustments and additions.  His recipe isn't a purist's laksa.  It incorporates more vegetables than most authentic laksas.  Regardless of authenticity, it's a very tasty soup and is perfect when you feel like you may be catching a cold.  Healthy, fragrant and healing.

PUMPKIN AND TOMATO LAKSA
adapted from Nigel Slater's The Kitchen Diaries
serves 4
Kabocha squash - about 3/4 lb unpeeled weight
6 Thai chiles
5 cloves garlic
1 shallot
fresh ginger - 1 thumb
2 fresh stalks of lemongrass
6 lime leaves
1 bunch fresh cilantro
olive oil
2 cups vegetable stock
1 cup coconut milk
1 cup fresh young coconut water (I used this to make a lighter version of the soup - you can use more coconut milk for a richer soup)
cherry tomatoes - 24 or 1 14oz can of organic chopped roasted Roma tomatoes
3 tbsp Thai fish sauce (Nam Pla)
juice of 1 lime
dried laksa noodles or rice sticks - about 1/4 lb.  cooked as directed
fresh mint leaves - large handful torn into pieces

Cut the pumpkin into large chunks and place in a steamer.  Steam until tender, about 12-15 minutes.  Remove from the heat.

Chop the chiles.  Remove the seeds based on how spicy you want the soup.
Peel the garlic, shallot and ginger.  Chop them roughly.  Discard the outer leaves of the lemongrass, roughly chop the inner section.  Finely cut the lime leaves.  Roughly chop the stems of the cilantro along with half of the cilantro leaves (reserve the other half for later).  
Combine the chiles, garlic, shallot, ginger, lemongrass, lime leaves, cilantro stems and leaves, and shrimp paste in a food processor.  Process into a paste.  Add a little oil if needed to help the processing.

Start a large deep pot over medium heat on the stove.  Add half of the spice paste and fry it, constantly stirring to prevent it from scorching (keep the other half in the fridge to make more soup or double the recipe and use it all).  Fry for a couple of minutes, then add the stock, coconut milk, coconut water and bring to a boil.  Immediately lower the heat to a simmer.

If using the cherry tomatoes, cut them in half and add them to the pot along with the Thai fish sauce, and lime juice.  Otherwise add the canned tomatoes.  Cook for about 10 minutes.  Add the Kabocha squash and cook for another minute or so.  Divide the already cooked noodles (based on noodle package instructions) into each of 4 bowls.  Pour the laksa over each bowl of noodles and add the mint and remaining cilantro leaves.

Tuesday, December 23, 2008

GARDEN PARTY - CONTD. PART 3 - TOMATOES & TOMATILLOS

Of course, it is a little late in the season to be talking about tomatoes and their brethren, but who truly cares.  Tomatoes are the best part of summer gardening and if you took some time to preserve them, you would be lucky enough to be enjoying them now.  Here are a couple of ideas that can be frozen for the wintry tomatoless months.  (Better yet, they are great easy recipes for tomato season and fantastic fresh)


GARDEN ROASTED TOMATO SAUCE
San Marzano tomatoes - cored, halved & de-seeded
Green Zebra tomatoes - cored, halved & de-seeded
4 garlic cloves - peeled & halved
1 Anaheim chile - roasted, peeled, seeded & chopped
1 jalapeno chile - seeded & chopped
1 small yellow onion - sliced into thin rings
3 anchovies - finely diced
3 Larry's smoked tomatoes (Boggy Creek Farm) - soaked in hot water until soft & finely sliced
Handful fresh parsley - finely chopped
Leaves of fresh oregano from a few sprigs - finely chopped
Handful fresh basil leaves - finely chopped
2 tbsps olive oil
sea salt
fresh ground pepper


Gently mix all ingredients in a bowl and then place tomatoes cut-side down in an oven safe baking dish.  Pour remainder of herbs and oil over the tomatoes.  Bake in a pre-heated oven at 425 degrees for approximately 45 minutes.  You can then either puree, chop or mash to your liking.  It all depends how rustic you like your sauce.  NOTE:  you may need to add a bit of lemon or vinegar to brighten it and some red pepper flakes to give it some bite.


I served the sauce tossed with Trofie pasta and grated parmesan cheese.  Trofie are a type of Ligurian gnocchi made with only flour and water.  They are little squiggly twisted short noodles and hold sauce very well.  They're a very easy fresh pasta to make.  No machine.  Just rolling dough out on a floured work surface, cutting into pieces, and rolling into a twist.  Delicious cakewalk.  


I also used the tomato sauce as a pizza sauce.  The only difference was that I ran it through a food mill until I had a very smooth tomato sauce.  

END NOTE:  We froze this sauce.  If you were going to make it for canning purposes you would have to adjust the acid content by adding lemon juice or vinegar.  Here is a link to a simple sauce designed for home canning.


ROASTED TOMATILLO SALSAS - TWO WAYS
MISE EN PLACE FOR BOTH SALSAS
2.75 lbs fresh tomatillos
6 fresh serrano chiles
3 fresh jalapeno chiles
1 fresh poblano chile
10 large cloves of garlic
1 fresh serrano chile - chopped with seeds

Roast the tomatillos on a foil lined baking sheet under the broiler until black spots show and the tomatillos are softened and juicy.  Alternately, you could use a grill with drip pan or a cast-iron skillet.  Collect the tomatillos and their juices in a bowl and set aside.

Flatten the dried chipotles (de-seed if you wish, depending on how hot you prefer your salsa).  Roast them on a griddle or cast-iron pan until fragrant, slightly toasted and darkened.  Soak the chiles in hot water for 30 minutes.

Roast the 6 fresh serranos, jalapenos, poblano, and 10 garlic cloves on a griddle until blackened.  The garlic should just be roasted until it shows black spots on all sides (peel when cool to the touch and reserve).  When roasted, put the chiles in a paper bag and close tightly for a few minutes.  This will loosen the skins.  Peel, seed, and roughly chop all of the chiles.


TOMATILLO SALSA
2 lbs of the roasted tomatillos
Roasted serrano chiles - peeled, seeded & roughly chopped
Roasted jalapeno chiles - peeled, seeded & roughly chopped
Roasted poblano chile - peeled, seeded & roughly chopped
7 cloves of roasted garlic - peeled & chopped
1 fresh serrano chile - chopped with seeds
1/3 cup fresh cilantro - chopped
juice from 1/2 of a lime
sea salt
1/2 small white onion - finely chopped, rinsed & drained

Mix ingredients together in a large bowl.  Take all the ingredients and run through the roughest setting of a food mill in batches (I love mine and wanted one, so that I didn't have to drag out the giant food processor to do simple tasks such as this recipe).  (Alternately, you can use a food processor, blender or molcajete )  Add 1/2 tsp sea salt to taste.  When seasoned to your liking, stir in the finely chopped white onion.  NOTE:  Using a mocajete is the traditional method and creates a very rustic memorable salsa, but also, a very labor intensive salsa.  A molcajete will season over time, much like a cast-iron skillet.  It will also impart a subtle flavor difference from the same recipe made with a blender or food processor.  The stone imparts some of it along with the seasoning.


CHIPOTLE TOMATILLO SALSA
12 ounces (3/4 lb) of the roasted tomatillos
3 of the roasted garlic cloves - peeled and chopped
7 dried rehydrated chipotle peppers - finely chopped (alternately, you could use 3-5 canned chipotles in adobo sauce)
1 tsp sea salt
1/4 tsp agave syrup

Mix all ingredients in a large bowl.  Run through the rough disk of a food mill in small batches.  Re-run the salsa through the food mill with a medium disk.  Check for seasoning.  (you could alternately use a food processor, blender or molcajete).  Note:  I make this salsa with both the canned chipotles and the dried.  I think that the dried give it a distinctly different result than the canned.  The dried give it a much more earthy deep flavor.  Try it both ways.  

END NOTE:
I freeze both salsas in single serving sizes, so that we can always have some salsa when needed. These salsas are intended to be eaten fresh or frozen, but not for canning.  They are low acid salsas and would require the addition of an acid such as vinegar or lemon juice in the right proportion to home "can" safely.  Here is a link to some salsas appropriate for canning with a hot water canner.


Tuesday, November 18, 2008

GARDEN PARTY CONTINUED - ANAHEIM CHILES


Ah... to continue. What to do with unending bushels of green chiles. There are many choices. Roast them. Dry them. Eat them fresh with eggs and chorizo. Put them on sandwiches. Make a stew. We did all of the above and still can't keep up with them.

One of my favorite things is green chile stew. My wife and I have good friends who live in Albuquerque, New Mexico, which is the home of green chile. I crave all of their chile-laden foods, carne adovada, papas con chile colorado, papas con chile verde, chiles rellenos, chile con queso, huevos rancheros, breakfast at Frontier, but especially, guisado de chile verde (green chile stew) from Duran's Pharmacy. Yes, a pharmacy. A pharmacy with a lunch counter with incredible red chile and green chile sauce. Don't miss it if you ever find yourself in that neck of the woods. Side Note... My wife and I used to take the Amtrak train from LA to Pittsburgh every Christmas. It was our annual trip to visit family and a way to totally check out from work, etc. Sit on a train and read, play cards and sleep. Layover in Chicago. Dinner at Topolobampo. Back on the train. Sleep. Wake up. Pittsburgh. Back to the story, the train always stopped in Albuquerque, and there was an incredible burrito vendor at the stop. He had the most incredible carne adovada burritos. I still crave them to this day. If you're ever in that area, it's worth a visit to the train station parking lot for one of these beauties.


Back to work. Green chile. What to do? Make a chile verde base. You can freeze it and use it for stew or chile cheeseburgers, burritos, eggs, queso, etc. Get a load of peppers. Roast them. Peel them. De-seed them. There you go....


GREEN CHILE BASE

1.2 lbs Anaheim or New Mexican green chiles - roasted, peeled, seeded and chopped
1 jalapeno - roasted, peeled, seeded and chopped
2 serrano chiles - roasted, peeled, seeded and chopped
6 roasted and cored tomatillos
4 roasted garlic cloves
1 tbsp New Mexico HOT green chile powder
1 cup vegetable stock
1/2 diced white onion
1 tbsp olive oil
smoked salt
black pepper
1 tsp dried Mexican oregano
1/2 tsp chile powder (optional)

Blend the tomatillos, garlic, green chile powder and vegetable stock until smooth. Reserve.
Sauté the white onion in a tbsp of olive oil until soft and golden in a large fry pan. Add the tomatillo puree and fry for a few minutes. Add smoked salt and freshly ground black pepper to taste. Add chile mixture, 3/4 cup vegetable stock, oregano and chile powder. Cook for approximately 10 minutes over medium heat until fragrant, softened and liquid is mostly evaporated. Separate into portions and freeze or use right away.

Oh, you would like to use the base. Okay. These are sloppy, oozing and delicious.


GREEN CHILE CHEESEBURGERS
makes 2 big burgers

1 lb 80% lean 20% fat prime grass-fed sustainably raised ground chuck
salt and fresh ground pepper
green chile base
1 tbsp chopped fresh epazote or cilantro
1/2 tsp cumin
1/2 tsp paprika
1 tsp all-purpose flour
1/4 cup water
2 thick slices cheese of your choice (suggestions: asadero or cheddar)
2 hamburger buns of your liking

In a saucepan, combine the chile base, chopped epazote or cilantro, cumin, paprika and cook in a little oil over moderately low heat until soft. Sprinkle the flour over the mixture and stir until combined well. Then, sprinkle in the water, stirring as you add. Bring the mixture to a simmer. Reduce heat to low and cook until thickened. About 4 minutes. Add salt and pepper to taste.

Combine the ground beef, salt and pepper and form into two 1/2 lb patties. Brush your pre-heated grill with oil (or cook them however you like) and cook the patties to your desired doneness. I use 7/5 for my grill. 7 minutes on the first side and 5 after flipping. That's for medium and that's for guests. I actually cook mine a hell of a lot more rare. Figure about 15 minutes for well done (Which is crazy to me. You can't taste the meat.) If you are a bad timing person for cooking meat and other things - check this out. Highly recommended and a completely essential book.

Grill the hamburger buns until lightly toasted. Top each burger with cheese before removing from the heat and add the chile topping, cooking until the cheese melts. I do the chile on top of the cheese. A smarter method is to do the chiles on the meat and then the cheese. Less messy. Transfer to a toasted bun and top with condiments of your choice. Tomatoes, onions, lettuce, ketchup, pickles, mustard, etc.

We still have chiles!!! What now. Something else that stores well in the fridge. Great with cheese and crackers as an appetizer. Check my wife's blog for her cracker recipe to go with the chutney.


GREEN CHILE CHUTNEY
Adapted from Mark Miller's The Great Chile Book

1 lb 13 oz anahiem chiles
3 oz shishito peppers
4 serrano peppers
1/4 tsp white peppercorns, cracked
1/2 tsp corriander whole crushed
1/2 tsp hot new mexico green chile powder
2 c sugar
1 TB roasted ground mexican oregano
2/3 c cider vinegar
1 tsp salt

Mix all ingredients together and cook for 10 to 15 minutes over med heat in an enamel or stainless steel pan.
Allow to cool and serve cold.

WE STILL HAVE CHILES!!!! The other thing you can do when your chiles keep coming and coming is to borrow your friend's dehydrator and dry some peppers. Easy peasy.


NEXT UP.... TOMATOES AND TOMATILLOS.

Tuesday, November 11, 2008

GARDEN PARTY - PICKLES


Considering this past summer's garden, leads to a few distinct thoughts. Number one, we have no problem growing Anaheim chiles and shishito peppers. Peppers in general, are not a problem for us. Number two, we weren't as successful with tomatoes as we would have liked to be. We definitely grew enough to keep us in tomatoes, but we didn't succeed in my plan to have enough to preserve for the winter months. We had about eight plants and about four of them were either not very productive or were never pollinated. These are things to think about over the winter months. It was mostly the heirloom varieties that were the troublemakers. Our San Marzano plants were amazingly delicious and very generous. Our Green Zebras were also good growers, as were our tomatillos.

Another issue was our Cucumbers. Our pickling cucumbers started off vigorously and then died, but our Japanese cucumbers were wonderful and we couldn't keep up with them. They produced too much too fast, but that was for about one month. Then, something killed them as well. Who knows what pestilence attacked them, but that will be added to my list for the winter to consider how to combat. Regardless, it was still a very fruitful garden. So, what did we do with the shishito peppers, Japanese cucumbers, Anaheim chiles and tomatoes? First up...

PART ONE: THE PICKLES.


REFRIGERATOR DILL PICKLES

4 Japanese cucumbers - sliced crosswise into 1/2" circles
1 small handful of shishito peppers or peppers of your choice
2 cups water
1 tsp celery seed
3 tbsp kosher salt
1 tbsp dill weed
1/2 tsp coriander seed
1 tsp sichuan peppercorns
2 cups distilled vinegar
2 tbsp agave syrup
8 cloves garlic - sliced
1 tbsp ground mustard
1 tsp red-pepper flakes

Salt the cucumbers with an additional tablespoon of salt. Mix in a colander and let drain for about an hour. Rinse, drain again and put into an appropriate sized jar. They should almost fill it up. A large mason jar or large-mouthed glass jar with tight-sealing lid will be perfect.

Crush the seeds and spices in a mortar and pestle or a spice grinder. Mix all other ingredients with the spices in a big bowl (except the cukes). Mix until all the salt dissolves. Pour the mixture over the cucumbers in the jar. Cap the jar and refrigerate for at least a week before eating.


QUICK PICKLED PEPPERS
adapted from Amy Scattergood, Los Angeles Times. July 23, 2008

3/4 lbs shishito peppers
5 serrano chiles sliced in half lengthwise
2 1/2 cups rice vinegar
3 cloves garlic, peeled and slightly smashed
2 tsps kosher salt
1 tbsp agave syrup
2 tsps dried oregano
1/2 tsp whole black peppercorns
1/2 tsp sichuan peppercorns
1/2 tsp coriander seeds
1 small white onion - sliced thinly
3 whole chiles de arbol or other small dried red chile

Cut a few thin lengthwise slit into each pepper.
Simmer the vinegar with 2 cups of water, garlic, salt, agave syrup, spices, onion and dried chile for about 4 minutes.
Blanch the peppers (shishitos and serranos) in a large pot of boiling water until they soften and their color just begins to fade (about 2-3 minutes). Drain the peppers and pat dry with a paper towel. Do not rinse them.
Place the warm peppers in a large glass jar with lid and pour the warm liquid mixture over them. Seal the jar and rotate to mix the solution and spices around in the jar. Refrigerate for at least 8 hours.


PICKLED HABANERO CHILES

Fresh unblemished habanero chiles - enough to fill your desired jar

Poke a few small slits with a knife into the top of each chile. Soak the chiles in overnight in a brine of 3 cups of water and 1 cup kosher salt. This will crisp the chiles before you pickle them. Rinse them well.

Pickling Brine

3 cups distilled white vinegar (I use Heinz)
3 cups water
1 1/2 tsp kosher salt

Combine the vinegar, water and salt in a saucepan and bring to a boil. Stir until salt is dissolved. Take off the heat.
Place the chiles in a sterilized glass jar (clean, rinse, dry and then pour boiling water into and over the jar and lid). Pack the chiles tightly and leave about 1/4 inch of head space. Pour the vinegar solution over the chiles. Remove air bubbles by tapping on the sides of the jar. You want the chiles to be submerged completely. Seal the jar and store in the refrigerator for 4 to 6 weeks before serving.

NOTE: All of the above recipes were intended to be quick refrigerator style pickles. If you want to preserve them at room temperature, you should follow more precise canning instructions for packing and sealing them in jars.

NEXT UP. ANAHEIM CHILES

Thursday, October 2, 2008

BIG IN JAPAN


Long time gone. Needed to cook. Set in the middle of the May 2008 Gourmet Magazine was an invitingly delicious article, photos and menu for a multi-course Japanese dinner party. Perfect, considering how much time I had just spent working around Austin, Texas. I'd had my fill of amazing barbecue, but I definitely didn't want to see anymore red meat in the near future. I can't say that I remember ever having tried recreating an entire menu from a magazine, so this was an interesting proposition. I have a fairly in-depth love and understanding of Japanese cooking and I've come especially to admire the simplicity, beauty and subtle flavors of Japanese home cooking. Because, it's home cooking, it's designed with that attitude in mind; using the freshest available produce in combination with preserved / pickled ingredients as the base of the meal and then having a bit of protein to round it out. Basically, the reverse of the normal American meal.

I intended to do the menu verbatim, but after reading it over a few times I felt I needed to make a couple changes. Based on the recipes I did make from the article, I'm sure everything I excluded or substituted would have been equally delicious. I substituted one of the salads for a rice dish to give the dinner a bit more substance. I also used a different way of preparing the cod (needs to marinate in a miso sauce for 3 days) for the fish dish and added a bit of oshinko (japanese pickle) in the form of daikon radish pickled in rice bran for a digestif after the meal. The dinner was served in courses, all dishes on their own individual plates. Everything was paired with Japanese beer and cold sake (I served my favorite sake, Kariho Namahage "Devil's Mask").

THE COURSES: (all recipes can be found here or posted below)
Shrimp and Daikon Salad with Ume-Shiso Dressing
Cucumbers with Wasabi and Rice Vinegar
Spicy Glazed Eggplant
Soboro Rice
Avocado and Watercress Salad
Black Cod with Mushrooms and Sansho Pepper
Elderflower Jelly with Honeydew Melon (note: I used
Pickled Daikon Radish Slice

NOTES:
For the Elderflower Jelly I substituted Agar-Agar for the gelatin for a more authentic Japanese texture. Agar-Agar is a natural form of gelatin derived from seaweed. It sets up much firmer than gelatin. For the cod, I utilized the mushroom / sauce recipe from the magazine, but I used Nobu Matsuhisa's method for cooking Black Cod. It's really worth the trouble to cook the cod in his manner, it makes an incredible difference. You'll never cook it any other way after doing it. You need to plan ahead, because it requires 3 days of marinating. Many of the sauces can be made ahead to help save time. I will say that this menu was fairly time consuming in preparation and serving everything on individual plates is an extra step probably not worth undertaking. Everything would be equally great served family style.

SOBORO RICE
adapted from Japanese Cooking, A Simple Art, by Shizuo Tsuji
FOR THE CHICKEN:
1/2 lb. ground organic free-range chicken
4 Tbsps sake
1 Tbsp tamari (all soybean soy sauce)
1 Tbsp agave nectar or sugar
1 tsp fresh ginger juice
FOR THE EGGS:
4 organic free-range eggs, beaten
1/4 tsp sea salt
1 Tbsp sake
1 Tbsp light soy sauce
1 Tbsp agave nectar or sugar
FOR THE SAUCE:
1 cup dashi
4 Tbsps tamari
1/2 Tbsp agave nectar or sugar
8 cups hot cooked sushi rice
julienned nori sheet for garnish

COOKING THE RICE:
wash the rice 1 hour before cooking and drain in a colander. Use enough water to cover the rice by 1 inch in a pot with a tight fitting lid, or use a rice cooker. (usually 1 cup water to 1 cup washed rice) Cook with the lid on over med-high heat just till a boil. Turn heat up to high and boil vigorously till the starchy liquid stops bubbling from under the lid. Reduce heat to low and cook until all the water is absorbed by the rice. Don't lift the lid and peek. You'll have a pretty good idea as to when it's done. Turn off the heat and let the rice rest for 20 minutes in the pot before you fluff the rice.
CHICKEN:
Cook ground chicken, sake, tamari, and agave syrup in a frying pan over high heat. Stir constantly and keep the chicken crumbled like loose sausage. When the chicken has turned whitish, mix in the ginger juice. Drain in a colander and let cool.
EGGS:
Beat the eggs with the salt, sake, light soy sauce and agave syrup. Scramble the eggs in a frying pan till somewhat dry and crumbled in texture like the chicken.
SAUCE:
Mix the dashi, tamari, and agave syrup in a small saucepan over high heat. Remove from the heat when it starts to boil.
Mix the eggs and chicken together. Put the rice into bowls and drizzle some of the sauce over each bowl. Top with the chicken egg mixture and garnish with the nori strips.


BLACK COD WITH MUSHROOMS AND SANSHO PEPPER
Adapted from Gourmet Magazine May 2008 and Nobu Matsuhisa
FOR BROTH:
1 cup water
6 Tbsps reduced-sodium soy sauce
2 Tbsps mirin
1/8 tsp ground sansho pepper, plus additional for sprinkling
1/8 tsp ground sichuan peppercorns
2 shallots, sliced
4 garlic cloves, thinly sliced, divided
2 tsps canola oil
7 oz fresh enoki mushrooms, cut into 3-inch lengths and spongy base discarded
5 oz fresh shimeji mushrooms, spongy base discarded
FOR FISH:
6 (7-oz) pieces black cod fillets with skin, about 1 1/2 inches thick
3 Tbsps mirin
4 Tbsps sake
1/2 cup white miso paste
1/3 cup sugar
vegetable oil for grilling
pickled ginger

MAKE BROTH:
Bring water, soy sauce, mirin, sansho pepper, sichuan pepper, shallots, and one third of garlic to a boil in a 1- to 2-quart heavy saucepan, then simmer 5 minutes. Take broth off heat and let stand for 10 minutes.
Cook remaining garlic in oil in a large heavy skillet over medium heat, stirring, until just golden. Add all mushrooms and cook, stirring occasionally, until tender, about 3 minutes.
Strain broth through a fine-mesh sieve or cheesecloth into mushroom mixture, and simmer 1 minute. Discard the solids. Set aside and keep warm and covered.
FISH:
Mix sake and mirin in a small saucepan and bring to a boil. Whisk the miso paste into the liquid until dissolved. Add the sugar and cook over med-high heat, stirring till dissolved. Rinse the fillets and pat dry with paper towels. Coat the fish well with the miso marinade. Put in a baking dish large enough to hold the fish (you can do the fish in a couple layers) along with any remaining marinade. Cover and refrigerate for 3 days. Remove fish from refrigerator while preheating oven to 400 degrees. Also, preheat grill or grill pan. Scrape the marinade off of the fillets. Grill the fillets over high heat for about 2 minutes, until browned. Take the fish off the grill and put on a heavy baking sheet and roast in oven for 10 minutes, until flaky.
Transfer fish to shallow bowls. Reheat the mushrooms and broth and divide among bowls, then sprinkle very lightly with more sansho pepper. Garnish with pickled ginger slices.

Tuesday, May 20, 2008

KNIVES OUT


I recently hit my big 4 - 0. It wasn't much of a big thing for me. I kept it simple and had a group of close friends out for dinner at my favorite Yakitori house in Little Tokyo, Kokekokko. A few of my friends also took me out for a breakfast of pastries and soft-boiled eggs at Le Pain Quotidien and then a crazy lunch of hot dogs at a new hot dog joint, The Infield. At the Infield, we ordered a good portion of the menu, but then the owner took over and treated us to his own choices, Wagyu Beef dogs from New Zealand, Chili Cheese dogs and for dessert, a Twinkie Dog. The Twinkie Dog consisted of a classic dog with a fried Twinkie as a bun topped with Cheez Wiz (geared to the late-night crowd). Crazy, yet not as terrible as it sounds. A bit overly sweet for me - it would've benefited from more Wiz. We did discover that deep frying Twinkies brings out how cloyingly sweet they actually are. You don't really taste it when they're straight out of the pack. Fry one and you won't be eating many.


Everything was great, but the day was really topped off by the most perfect birthday present I could receive. My wife presented me with a beautiful Bob Kramer, handmade 5-inch Utility knife with a Rosewood handle. It was especially great because she had gotten me a 8-inch Chef's knife from Kramer for my 30th Birthday. 10 years later, I get my second heirloom-quality knife. I've loved the 8-inch Chef's knife since I received it and have always wanted another, but there has been a backlog and long wait for his knives (currently 3 years). They are amazing pieces of art, well worth the wait and the cost. They are not cheap, but you get what you pay for. Kramer has been making custom kitchen knives for almost 20 years. The knives' handles are dense beautiful hardwood (usually Cocobolo or other exotic hardwoods if specially requested) with precisely inlaid metal detailing and the blades are forged with 52100 Carbon Steel, hardened in a six-hour long, seven step heat-treating process. Needless to say, they are sweet. They feel great in your hand, cut amazing, and hold a very sharp edge for a long time (I cut myself by barely touching the blade putting it into my knife bag - seems I always need to christen a new knife with a cut of my finger). The Carbon steel does need a little more care than a Stainless steel knife, but it's basic. Just keep it clean and dry. Clean well after cutting acidic foods or it will stain and could show bits of rust. All can be polished easily with some soap and a green scotch brite pad. You can see in the one picture my Chef's knife is showing some staining. I haven't polished it lately because the look doesn't really bother me, but I will.


I think that if you're going to cook and cook often, you need to have good knives. You don't need a gazillion different ones. I think the most useful ones to spend some money on would be a Chef's knife (6-inch or 8-inch) and a Utility knife (4-inch or 5-inch). After that, you could spend some money depending on your budget on any number of other knives. My other decent knives are a Carving knife (barely use) and a Boning knife (constantly use). Oh, and a cleaver, but I use that mostly for opening coconuts (probably should be using something cheaper for that).

Thanks again to my wife for such a thoughtful fantastic Fortieth Birthday present.