Tuesday, December 23, 2008

GARDEN PARTY - CONTD. PART 3 - TOMATOES & TOMATILLOS

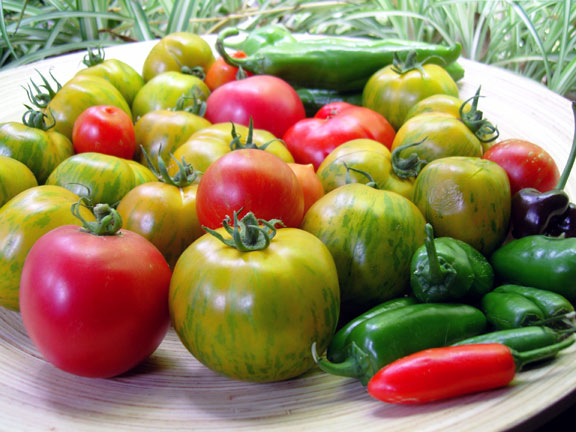
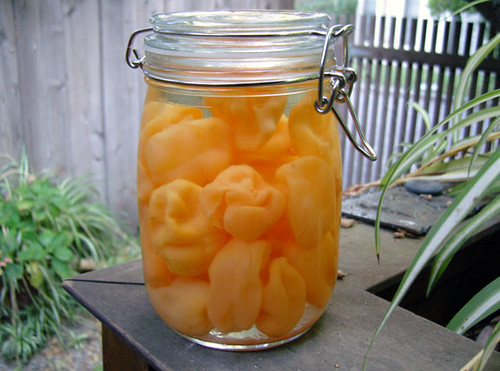
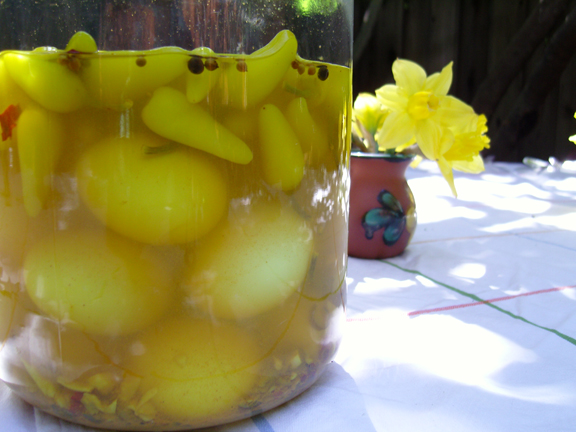
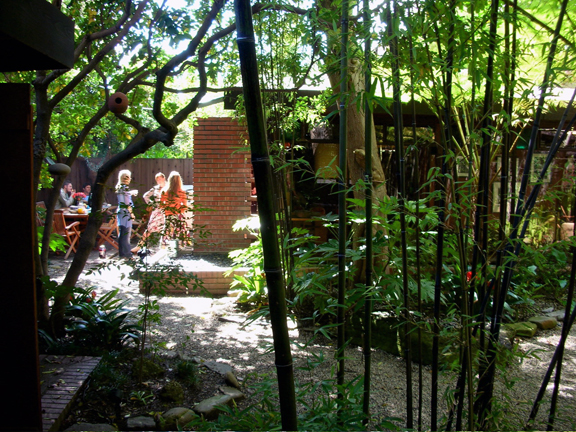
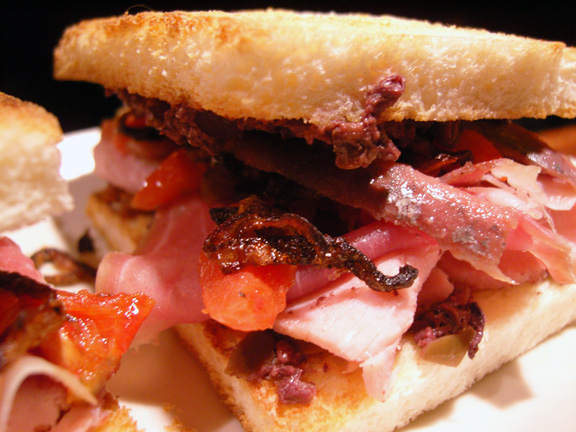
Of course, it is a little late in the season to be talking about tomatoes and their brethren, but who truly cares.  Tomatoes are the best part of summer gardening and if you took some time to preserve them, you would be lucky enough to be enjoying them now.  Here are a couple of ideas that can be frozen for the wintry tomatoless months.  (Better yet, they are great easy recipes for tomato season and fantastic fresh)


GARDEN ROASTED TOMATO SAUCE
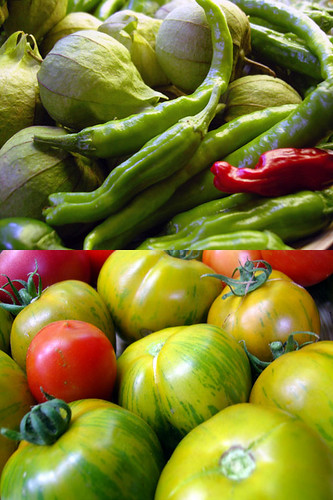
San Marzano tomatoes - cored, halved & de-seeded
Green Zebra tomatoes - cored, halved & de-seeded
4 garlic cloves - peeled & halved
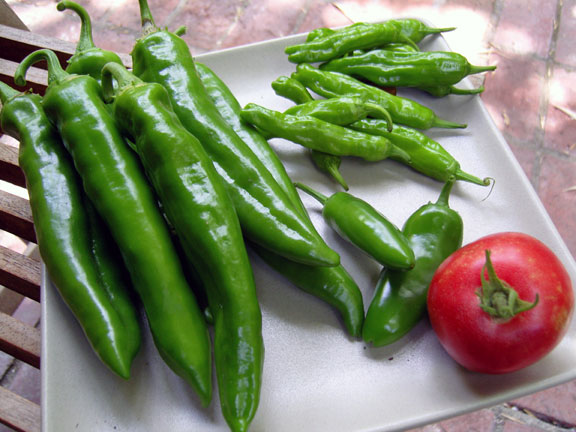
1 Anaheim chile - roasted, peeled, seeded & chopped
1 jalapeno chile - seeded & chopped
1 small yellow onion - sliced into thin rings
3 anchovies - finely diced
3 Larry's smoked tomatoes (Boggy Creek Farm) - soaked in hot water until soft & finely sliced
Handful fresh parsley - finely chopped
Leaves of fresh oregano from a few sprigs - finely chopped
Handful fresh basil leaves - finely chopped
2 tbsps olive oil
sea salt
fresh ground pepper


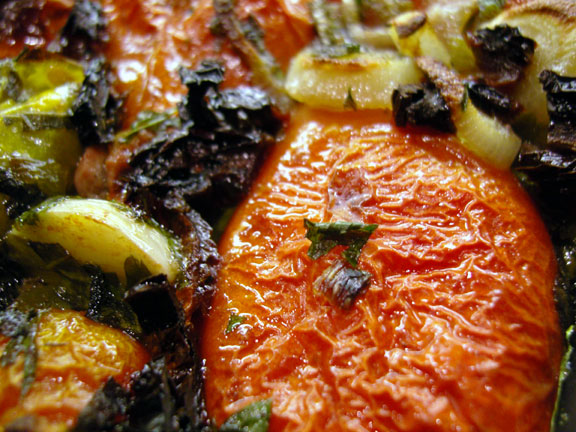
Gently mix all ingredients in a bowl and then place tomatoes cut-side down in an oven safe baking dish.  Pour remainder of herbs and oil over the tomatoes.  Bake in a pre-heated oven at 425 degrees for approximately 45 minutes.  You can then either puree, chop or mash to your liking.  It all depends how rustic you like your sauce.  NOTE:  you may need to add a bit of lemon or vinegar to brighten it and some red pepper flakes to give it some bite.


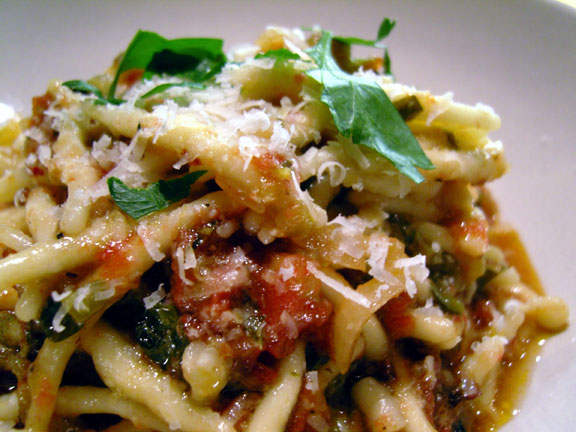
I served the sauce tossed with Trofie pasta and grated parmesan cheese.  Trofie are a type of Ligurian gnocchi made with only flour and water.  They are little squiggly twisted short noodles and hold sauce very well.  They're a very easy fresh pasta to make.  No machine.  Just rolling dough out on a floured work surface, cutting into pieces, and rolling into a twist.  Delicious cakewalk.  


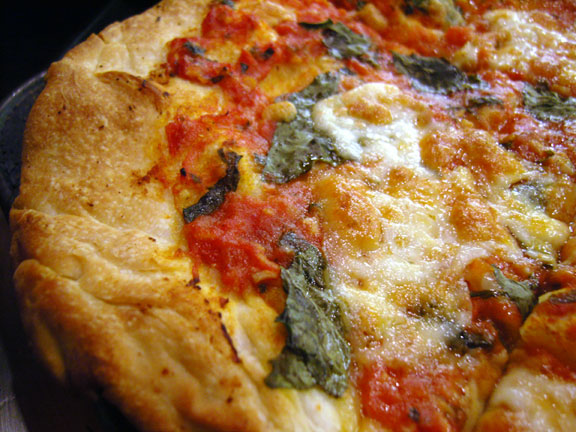
I also used the tomato sauce as a pizza sauce.  The only difference was that I ran it through a food mill until I had a very smooth tomato sauce.  

END NOTE:  We froze this sauce.  If you were going to make it for canning purposes you would have to adjust the acid content by adding lemon juice or vinegar.  Here is a link to a simple sauce designed for home canning.


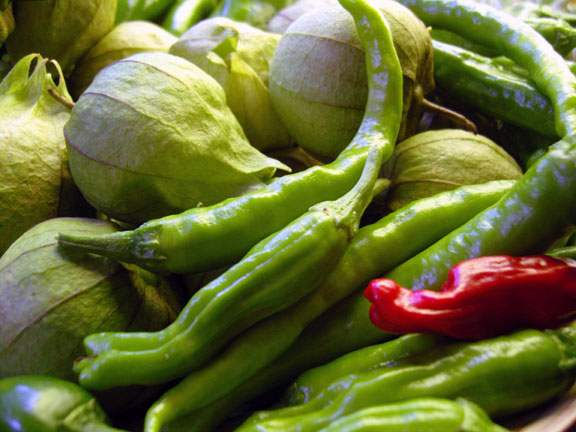
ROASTED TOMATILLO SALSAS - TWO WAYS
MISE EN PLACE FOR BOTH SALSAS
2.75 lbs fresh tomatillos
6 fresh serrano chiles
3 fresh jalapeno chiles
1 fresh poblano chile
10 large cloves of garlic
1 fresh serrano chile - chopped with seeds

Roast the tomatillos on a foil lined baking sheet under the broiler until black spots show and the tomatillos are softened and juicy.  Alternately, you could use a grill with drip pan or a cast-iron skillet.  Collect the tomatillos and their juices in a bowl and set aside.

Flatten the dried chipotles (de-seed if you wish, depending on how hot you prefer your salsa).  Roast them on a griddle or cast-iron pan until fragrant, slightly toasted and darkened.  Soak the chiles in hot water for 30 minutes.

Roast the 6 fresh serranos, jalapenos, poblano, and 10 garlic cloves on a griddle until blackened.  The garlic should just be roasted until it shows black spots on all sides (peel when cool to the touch and reserve).  When roasted, put the chiles in a paper bag and close tightly for a few minutes.  This will loosen the skins.  Peel, seed, and roughly chop all of the chiles.


TOMATILLO SALSA
2 lbs of the roasted tomatillos
Roasted serrano chiles - peeled, seeded & roughly chopped
Roasted jalapeno chiles - peeled, seeded & roughly chopped
Roasted poblano chile - peeled, seeded & roughly chopped
7 cloves of roasted garlic - peeled & chopped
1 fresh serrano chile - chopped with seeds
1/3 cup fresh cilantro - chopped
juice from 1/2 of a lime
sea salt
1/2 small white onion - finely chopped, rinsed & drained

Mix ingredients together in a large bowl.  Take all the ingredients and run through the roughest setting of a food mill in batches (I love mine and wanted one, so that I didn't have to drag out the giant food processor to do simple tasks such as this recipe).  (Alternately, you can use a food processor, blender or molcajete )  Add 1/2 tsp sea salt to taste.  When seasoned to your liking, stir in the finely chopped white onion.  NOTE:  Using a mocajete is the traditional method and creates a very rustic memorable salsa, but also, a very labor intensive salsa.  A molcajete will season over time, much like a cast-iron skillet.  It will also impart a subtle flavor difference from the same recipe made with a blender or food processor.  The stone imparts some of it along with the seasoning.


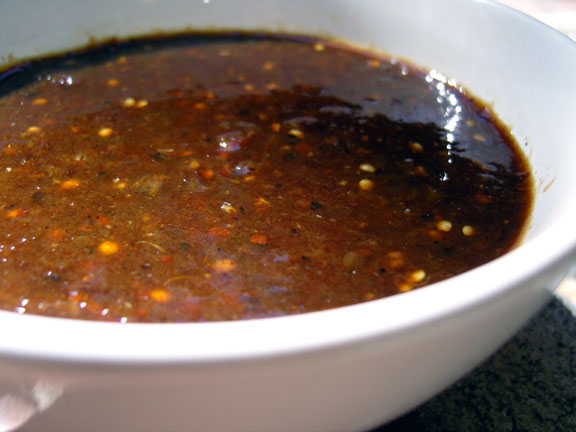
CHIPOTLE TOMATILLO SALSA
12 ounces (3/4 lb) of the roasted tomatillos
3 of the roasted garlic cloves - peeled and chopped
7 dried rehydrated chipotle peppers - finely chopped (alternately, you could use 3-5 canned chipotles in adobo sauce)
1 tsp sea salt
1/4 tsp agave syrup

Mix all ingredients in a large bowl.  Run through the rough disk of a food mill in small batches.  Re-run the salsa through the food mill with a medium disk.  Check for seasoning.  (you could alternately use a food processor, blender or molcajete).  Note:  I make this salsa with both the canned chipotles and the dried.  I think that the dried give it a distinctly different result than the canned.  The dried give it a much more earthy deep flavor.  Try it both ways.  

END NOTE:
I freeze both salsas in single serving sizes, so that we can always have some salsa when needed. These salsas are intended to be eaten fresh or frozen, but not for canning.  They are low acid salsas and would require the addition of an acid such as vinegar or lemon juice in the right proportion to home "can" safely.  Here is a link to some salsas appropriate for canning with a hot water canner.


Tuesday, November 18, 2008

GARDEN PARTY CONTINUED - ANAHEIM CHILES


Ah... to continue. What to do with unending bushels of green chiles. There are many choices. Roast them. Dry them. Eat them fresh with eggs and chorizo. Put them on sandwiches. Make a stew. We did all of the above and still can't keep up with them.

One of my favorite things is green chile stew. My wife and I have good friends who live in Albuquerque, New Mexico, which is the home of green chile. I crave all of their chile-laden foods, carne adovada, papas con chile colorado, papas con chile verde, chiles rellenos, chile con queso, huevos rancheros, breakfast at Frontier, but especially, guisado de chile verde (green chile stew) from Duran's Pharmacy. Yes, a pharmacy. A pharmacy with a lunch counter with incredible red chile and green chile sauce. Don't miss it if you ever find yourself in that neck of the woods. Side Note... My wife and I used to take the Amtrak train from LA to Pittsburgh every Christmas. It was our annual trip to visit family and a way to totally check out from work, etc. Sit on a train and read, play cards and sleep. Layover in Chicago. Dinner at Topolobampo. Back on the train. Sleep. Wake up. Pittsburgh. Back to the story, the train always stopped in Albuquerque, and there was an incredible burrito vendor at the stop. He had the most incredible carne adovada burritos. I still crave them to this day. If you're ever in that area, it's worth a visit to the train station parking lot for one of these beauties.


Back to work. Green chile. What to do? Make a chile verde base. You can freeze it and use it for stew or chile cheeseburgers, burritos, eggs, queso, etc. Get a load of peppers. Roast them. Peel them. De-seed them. There you go....


GREEN CHILE BASE

1.2 lbs Anaheim or New Mexican green chiles - roasted, peeled, seeded and chopped
1 jalapeno - roasted, peeled, seeded and chopped
2 serrano chiles - roasted, peeled, seeded and chopped
6 roasted and cored tomatillos
4 roasted garlic cloves
1 tbsp New Mexico HOT green chile powder
1 cup vegetable stock
1/2 diced white onion
1 tbsp olive oil
smoked salt
black pepper
1 tsp dried Mexican oregano
1/2 tsp chile powder (optional)

Blend the tomatillos, garlic, green chile powder and vegetable stock until smooth. Reserve.
Sauté the white onion in a tbsp of olive oil until soft and golden in a large fry pan. Add the tomatillo puree and fry for a few minutes. Add smoked salt and freshly ground black pepper to taste. Add chile mixture, 3/4 cup vegetable stock, oregano and chile powder. Cook for approximately 10 minutes over medium heat until fragrant, softened and liquid is mostly evaporated. Separate into portions and freeze or use right away.

Oh, you would like to use the base. Okay. These are sloppy, oozing and delicious.


GREEN CHILE CHEESEBURGERS
makes 2 big burgers

1 lb 80% lean 20% fat prime grass-fed sustainably raised ground chuck
salt and fresh ground pepper
green chile base
1 tbsp chopped fresh epazote or cilantro
1/2 tsp cumin
1/2 tsp paprika
1 tsp all-purpose flour
1/4 cup water
2 thick slices cheese of your choice (suggestions: asadero or cheddar)
2 hamburger buns of your liking

In a saucepan, combine the chile base, chopped epazote or cilantro, cumin, paprika and cook in a little oil over moderately low heat until soft. Sprinkle the flour over the mixture and stir until combined well. Then, sprinkle in the water, stirring as you add. Bring the mixture to a simmer. Reduce heat to low and cook until thickened. About 4 minutes. Add salt and pepper to taste.

Combine the ground beef, salt and pepper and form into two 1/2 lb patties. Brush your pre-heated grill with oil (or cook them however you like) and cook the patties to your desired doneness. I use 7/5 for my grill. 7 minutes on the first side and 5 after flipping. That's for medium and that's for guests. I actually cook mine a hell of a lot more rare. Figure about 15 minutes for well done (Which is crazy to me. You can't taste the meat.) If you are a bad timing person for cooking meat and other things - check this out. Highly recommended and a completely essential book.

Grill the hamburger buns until lightly toasted. Top each burger with cheese before removing from the heat and add the chile topping, cooking until the cheese melts. I do the chile on top of the cheese. A smarter method is to do the chiles on the meat and then the cheese. Less messy. Transfer to a toasted bun and top with condiments of your choice. Tomatoes, onions, lettuce, ketchup, pickles, mustard, etc.

We still have chiles!!! What now. Something else that stores well in the fridge. Great with cheese and crackers as an appetizer. Check my wife's blog for her cracker recipe to go with the chutney.


GREEN CHILE CHUTNEY
Adapted from Mark Miller's The Great Chile Book

1 lb 13 oz anahiem chiles
3 oz shishito peppers
4 serrano peppers
1/4 tsp white peppercorns, cracked
1/2 tsp corriander whole crushed
1/2 tsp hot new mexico green chile powder
2 c sugar
1 TB roasted ground mexican oregano
2/3 c cider vinegar
1 tsp salt

Mix all ingredients together and cook for 10 to 15 minutes over med heat in an enamel or stainless steel pan.
Allow to cool and serve cold.

WE STILL HAVE CHILES!!!! The other thing you can do when your chiles keep coming and coming is to borrow your friend's dehydrator and dry some peppers. Easy peasy.


NEXT UP.... TOMATOES AND TOMATILLOS.

Tuesday, November 11, 2008

GARDEN PARTY - PICKLES


Considering this past summer's garden, leads to a few distinct thoughts. Number one, we have no problem growing Anaheim chiles and shishito peppers. Peppers in general, are not a problem for us. Number two, we weren't as successful with tomatoes as we would have liked to be. We definitely grew enough to keep us in tomatoes, but we didn't succeed in my plan to have enough to preserve for the winter months. We had about eight plants and about four of them were either not very productive or were never pollinated. These are things to think about over the winter months. It was mostly the heirloom varieties that were the troublemakers. Our San Marzano plants were amazingly delicious and very generous. Our Green Zebras were also good growers, as were our tomatillos.

Another issue was our Cucumbers. Our pickling cucumbers started off vigorously and then died, but our Japanese cucumbers were wonderful and we couldn't keep up with them. They produced too much too fast, but that was for about one month. Then, something killed them as well. Who knows what pestilence attacked them, but that will be added to my list for the winter to consider how to combat. Regardless, it was still a very fruitful garden. So, what did we do with the shishito peppers, Japanese cucumbers, Anaheim chiles and tomatoes? First up...

PART ONE: THE PICKLES.


REFRIGERATOR DILL PICKLES

4 Japanese cucumbers - sliced crosswise into 1/2" circles
1 small handful of shishito peppers or peppers of your choice
2 cups water
1 tsp celery seed
3 tbsp kosher salt
1 tbsp dill weed
1/2 tsp coriander seed
1 tsp sichuan peppercorns
2 cups distilled vinegar
2 tbsp agave syrup
8 cloves garlic - sliced
1 tbsp ground mustard
1 tsp red-pepper flakes

Salt the cucumbers with an additional tablespoon of salt. Mix in a colander and let drain for about an hour. Rinse, drain again and put into an appropriate sized jar. They should almost fill it up. A large mason jar or large-mouthed glass jar with tight-sealing lid will be perfect.

Crush the seeds and spices in a mortar and pestle or a spice grinder. Mix all other ingredients with the spices in a big bowl (except the cukes). Mix until all the salt dissolves. Pour the mixture over the cucumbers in the jar. Cap the jar and refrigerate for at least a week before eating.


QUICK PICKLED PEPPERS
adapted from Amy Scattergood, Los Angeles Times. July 23, 2008

3/4 lbs shishito peppers
5 serrano chiles sliced in half lengthwise
2 1/2 cups rice vinegar
3 cloves garlic, peeled and slightly smashed
2 tsps kosher salt
1 tbsp agave syrup
2 tsps dried oregano
1/2 tsp whole black peppercorns
1/2 tsp sichuan peppercorns
1/2 tsp coriander seeds
1 small white onion - sliced thinly
3 whole chiles de arbol or other small dried red chile

Cut a few thin lengthwise slit into each pepper.
Simmer the vinegar with 2 cups of water, garlic, salt, agave syrup, spices, onion and dried chile for about 4 minutes.
Blanch the peppers (shishitos and serranos) in a large pot of boiling water until they soften and their color just begins to fade (about 2-3 minutes). Drain the peppers and pat dry with a paper towel. Do not rinse them.
Place the warm peppers in a large glass jar with lid and pour the warm liquid mixture over them. Seal the jar and rotate to mix the solution and spices around in the jar. Refrigerate for at least 8 hours.


PICKLED HABANERO CHILES

Fresh unblemished habanero chiles - enough to fill your desired jar

Poke a few small slits with a knife into the top of each chile. Soak the chiles in overnight in a brine of 3 cups of water and 1 cup kosher salt. This will crisp the chiles before you pickle them. Rinse them well.

Pickling Brine

3 cups distilled white vinegar (I use Heinz)
3 cups water
1 1/2 tsp kosher salt

Combine the vinegar, water and salt in a saucepan and bring to a boil. Stir until salt is dissolved. Take off the heat.
Place the chiles in a sterilized glass jar (clean, rinse, dry and then pour boiling water into and over the jar and lid). Pack the chiles tightly and leave about 1/4 inch of head space. Pour the vinegar solution over the chiles. Remove air bubbles by tapping on the sides of the jar. You want the chiles to be submerged completely. Seal the jar and store in the refrigerator for 4 to 6 weeks before serving.

NOTE: All of the above recipes were intended to be quick refrigerator style pickles. If you want to preserve them at room temperature, you should follow more precise canning instructions for packing and sealing them in jars.

NEXT UP. ANAHEIM CHILES

Thursday, October 2, 2008

BIG IN JAPAN


Long time gone. Needed to cook. Set in the middle of the May 2008 Gourmet Magazine was an invitingly delicious article, photos and menu for a multi-course Japanese dinner party. Perfect, considering how much time I had just spent working around Austin, Texas. I'd had my fill of amazing barbecue, but I definitely didn't want to see anymore red meat in the near future. I can't say that I remember ever having tried recreating an entire menu from a magazine, so this was an interesting proposition. I have a fairly in-depth love and understanding of Japanese cooking and I've come especially to admire the simplicity, beauty and subtle flavors of Japanese home cooking. Because, it's home cooking, it's designed with that attitude in mind; using the freshest available produce in combination with preserved / pickled ingredients as the base of the meal and then having a bit of protein to round it out. Basically, the reverse of the normal American meal.

I intended to do the menu verbatim, but after reading it over a few times I felt I needed to make a couple changes. Based on the recipes I did make from the article, I'm sure everything I excluded or substituted would have been equally delicious. I substituted one of the salads for a rice dish to give the dinner a bit more substance. I also used a different way of preparing the cod (needs to marinate in a miso sauce for 3 days) for the fish dish and added a bit of oshinko (japanese pickle) in the form of daikon radish pickled in rice bran for a digestif after the meal. The dinner was served in courses, all dishes on their own individual plates. Everything was paired with Japanese beer and cold sake (I served my favorite sake, Kariho Namahage "Devil's Mask").

THE COURSES: (all recipes can be found here or posted below)
Shrimp and Daikon Salad with Ume-Shiso Dressing
Cucumbers with Wasabi and Rice Vinegar
Spicy Glazed Eggplant
Soboro Rice
Avocado and Watercress Salad
Black Cod with Mushrooms and Sansho Pepper
Elderflower Jelly with Honeydew Melon (note: I used
Pickled Daikon Radish Slice

NOTES:
For the Elderflower Jelly I substituted Agar-Agar for the gelatin for a more authentic Japanese texture. Agar-Agar is a natural form of gelatin derived from seaweed. It sets up much firmer than gelatin. For the cod, I utilized the mushroom / sauce recipe from the magazine, but I used Nobu Matsuhisa's method for cooking Black Cod. It's really worth the trouble to cook the cod in his manner, it makes an incredible difference. You'll never cook it any other way after doing it. You need to plan ahead, because it requires 3 days of marinating. Many of the sauces can be made ahead to help save time. I will say that this menu was fairly time consuming in preparation and serving everything on individual plates is an extra step probably not worth undertaking. Everything would be equally great served family style.

SOBORO RICE
adapted from Japanese Cooking, A Simple Art, by Shizuo Tsuji
FOR THE CHICKEN:
1/2 lb. ground organic free-range chicken
4 Tbsps sake
1 Tbsp tamari (all soybean soy sauce)
1 Tbsp agave nectar or sugar
1 tsp fresh ginger juice
FOR THE EGGS:
4 organic free-range eggs, beaten
1/4 tsp sea salt
1 Tbsp sake
1 Tbsp light soy sauce
1 Tbsp agave nectar or sugar
FOR THE SAUCE:
1 cup dashi
4 Tbsps tamari
1/2 Tbsp agave nectar or sugar
8 cups hot cooked sushi rice
julienned nori sheet for garnish

COOKING THE RICE:
wash the rice 1 hour before cooking and drain in a colander. Use enough water to cover the rice by 1 inch in a pot with a tight fitting lid, or use a rice cooker. (usually 1 cup water to 1 cup washed rice) Cook with the lid on over med-high heat just till a boil. Turn heat up to high and boil vigorously till the starchy liquid stops bubbling from under the lid. Reduce heat to low and cook until all the water is absorbed by the rice. Don't lift the lid and peek. You'll have a pretty good idea as to when it's done. Turn off the heat and let the rice rest for 20 minutes in the pot before you fluff the rice.
CHICKEN:
Cook ground chicken, sake, tamari, and agave syrup in a frying pan over high heat. Stir constantly and keep the chicken crumbled like loose sausage. When the chicken has turned whitish, mix in the ginger juice. Drain in a colander and let cool.
EGGS:
Beat the eggs with the salt, sake, light soy sauce and agave syrup. Scramble the eggs in a frying pan till somewhat dry and crumbled in texture like the chicken.
SAUCE:
Mix the dashi, tamari, and agave syrup in a small saucepan over high heat. Remove from the heat when it starts to boil.
Mix the eggs and chicken together. Put the rice into bowls and drizzle some of the sauce over each bowl. Top with the chicken egg mixture and garnish with the nori strips.


BLACK COD WITH MUSHROOMS AND SANSHO PEPPER
Adapted from Gourmet Magazine May 2008 and Nobu Matsuhisa
FOR BROTH:
1 cup water
6 Tbsps reduced-sodium soy sauce
2 Tbsps mirin
1/8 tsp ground sansho pepper, plus additional for sprinkling
1/8 tsp ground sichuan peppercorns
2 shallots, sliced
4 garlic cloves, thinly sliced, divided
2 tsps canola oil
7 oz fresh enoki mushrooms, cut into 3-inch lengths and spongy base discarded
5 oz fresh shimeji mushrooms, spongy base discarded
FOR FISH:
6 (7-oz) pieces black cod fillets with skin, about 1 1/2 inches thick
3 Tbsps mirin
4 Tbsps sake
1/2 cup white miso paste
1/3 cup sugar
vegetable oil for grilling
pickled ginger

MAKE BROTH:
Bring water, soy sauce, mirin, sansho pepper, sichuan pepper, shallots, and one third of garlic to a boil in a 1- to 2-quart heavy saucepan, then simmer 5 minutes. Take broth off heat and let stand for 10 minutes.
Cook remaining garlic in oil in a large heavy skillet over medium heat, stirring, until just golden. Add all mushrooms and cook, stirring occasionally, until tender, about 3 minutes.
Strain broth through a fine-mesh sieve or cheesecloth into mushroom mixture, and simmer 1 minute. Discard the solids. Set aside and keep warm and covered.
FISH:
Mix sake and mirin in a small saucepan and bring to a boil. Whisk the miso paste into the liquid until dissolved. Add the sugar and cook over med-high heat, stirring till dissolved. Rinse the fillets and pat dry with paper towels. Coat the fish well with the miso marinade. Put in a baking dish large enough to hold the fish (you can do the fish in a couple layers) along with any remaining marinade. Cover and refrigerate for 3 days. Remove fish from refrigerator while preheating oven to 400 degrees. Also, preheat grill or grill pan. Scrape the marinade off of the fillets. Grill the fillets over high heat for about 2 minutes, until browned. Take the fish off the grill and put on a heavy baking sheet and roast in oven for 10 minutes, until flaky.
Transfer fish to shallow bowls. Reheat the mushrooms and broth and divide among bowls, then sprinkle very lightly with more sansho pepper. Garnish with pickled ginger slices.

Tuesday, May 20, 2008

KNIVES OUT


I recently hit my big 4 - 0. It wasn't much of a big thing for me. I kept it simple and had a group of close friends out for dinner at my favorite Yakitori house in Little Tokyo, Kokekokko. A few of my friends also took me out for a breakfast of pastries and soft-boiled eggs at Le Pain Quotidien and then a crazy lunch of hot dogs at a new hot dog joint, The Infield. At the Infield, we ordered a good portion of the menu, but then the owner took over and treated us to his own choices, Wagyu Beef dogs from New Zealand, Chili Cheese dogs and for dessert, a Twinkie Dog. The Twinkie Dog consisted of a classic dog with a fried Twinkie as a bun topped with Cheez Wiz (geared to the late-night crowd). Crazy, yet not as terrible as it sounds. A bit overly sweet for me - it would've benefited from more Wiz. We did discover that deep frying Twinkies brings out how cloyingly sweet they actually are. You don't really taste it when they're straight out of the pack. Fry one and you won't be eating many.


Everything was great, but the day was really topped off by the most perfect birthday present I could receive. My wife presented me with a beautiful Bob Kramer, handmade 5-inch Utility knife with a Rosewood handle. It was especially great because she had gotten me a 8-inch Chef's knife from Kramer for my 30th Birthday. 10 years later, I get my second heirloom-quality knife. I've loved the 8-inch Chef's knife since I received it and have always wanted another, but there has been a backlog and long wait for his knives (currently 3 years). They are amazing pieces of art, well worth the wait and the cost. They are not cheap, but you get what you pay for. Kramer has been making custom kitchen knives for almost 20 years. The knives' handles are dense beautiful hardwood (usually Cocobolo or other exotic hardwoods if specially requested) with precisely inlaid metal detailing and the blades are forged with 52100 Carbon Steel, hardened in a six-hour long, seven step heat-treating process. Needless to say, they are sweet. They feel great in your hand, cut amazing, and hold a very sharp edge for a long time (I cut myself by barely touching the blade putting it into my knife bag - seems I always need to christen a new knife with a cut of my finger). The Carbon steel does need a little more care than a Stainless steel knife, but it's basic. Just keep it clean and dry. Clean well after cutting acidic foods or it will stain and could show bits of rust. All can be polished easily with some soap and a green scotch brite pad. You can see in the one picture my Chef's knife is showing some staining. I haven't polished it lately because the look doesn't really bother me, but I will.


I think that if you're going to cook and cook often, you need to have good knives. You don't need a gazillion different ones. I think the most useful ones to spend some money on would be a Chef's knife (6-inch or 8-inch) and a Utility knife (4-inch or 5-inch). After that, you could spend some money depending on your budget on any number of other knives. My other decent knives are a Carving knife (barely use) and a Boning knife (constantly use). Oh, and a cleaver, but I use that mostly for opening coconuts (probably should be using something cheaper for that).

Thanks again to my wife for such a thoughtful fantastic Fortieth Birthday present.

Friday, May 16, 2008

PICKLED EGGS


Slacking again. Been on the road another long spell for work. Despite that, I still owe you these recipes from my Easter post. Pickled Eggs pickled in two variations, sweet and spicy.

My mother made beet pickled eggs for Easter as far back as I can remember. They were a good gateway device to introducing a kid to beets. Beyond those eggs, I had no idea what a beet even was. I'm sure I threw away the yolks and concentrated on the vinegar sweet purple-stained whites. I wouldn't do that now, but I can say that I watched a friend at our Easter dinner put down six eggs in about 4 minutes sans yolks. His excuse was "cholesterol". It was a sad sight. Six lonely yolks sitting on a plate, wasted. My Pickled Beets with Red Eggs is an evolving recipe. I based it on a combination of recipes, mostly traditional Amish versions. I've tweaked it here and there over the years and I'm happy with it's current state.

My Pickled beets with red eggs
9 beets
water to cover
1 cup cider vinegar - Ha's Apple Farm Vinegar (my local apple grower)
1 cup cold water
1/2 cup brown sugar, firmly packed
1 tsp salt
1.5 stick cinnamon
7 cloves
10 whole peppercorns
1/4 tsp ground mustard - Colman's
16 hard-boiled eggs - peeled
cook beets on high for 12 mins. Let stand. Make sauce. Mix all together. Drain beets. Slip off skins. Pour sauce over beets. Cover. Cook on high for 8 mins. Let stand several days. Add eggs to sauce and some beets. Let pickle for at least 2 days in the refrigerator. Store in the refrigerator as well.


The spicy pepper eggs are my version of Joe Jost's pickled eggs. Joe Jost's is a great old family -owned tavern in Long Beach, California. The bar has a separate pool hall in back with pool tables, snooker tables, and a shuffle board. Foodwise, you can get amazingly simple, yet super delicious sandwiches at the bar. I rotate through three of the sandwiches: Joe's Special, Liverwurst (2 inches thick) with Red Onions and mustard, or Thick sliced Salami (thick means THICK) with cheese. Joe's Special consists of two split Polish Sausages (basically, hot dogs) with a pickle spear, swiss cheese and mustard on rye. This would be my proper set-up for a bit of relaxing at Joe's while watching a game: a Joe's Special, a Schooner of beer (Sierra Nevada), two pickled eggs (or more), and some fresh roasted peanuts. The pickled eggs are served with some yellow pickled peppers on top of a handful of skinny pretzel sticks, wet with the pickling juice. Delicious.

My eggs are pretty close to the real thing. Actually, they're probably better, but of course they lack a certain je ne sais quoi that you won't get unless you're at Joe's. After all, Joe's claims to have sold 6,000,000 of the eggs since 1934. More on Joe Jost's here.

My Joe Jost style Pickled Eggs

2 16oz jars hot yellow chili peppers with juice
3tbsp Pickling Spice
2 cups distilled vinegar
2 cups water
1.5 tbsp Sugar
1.5 tsp Turmeric
2.5 tsp Salt
5 Serrano, Jalapeno, or Habanero (your choice) chiles blistered, peeled & chopped – with seeds
3 cloves garlic chopped
20 hard-boiled eggs - peeled
Combine all the ingredients and mix well in a large sanitized jar that can be sealed. Add the peeled hard-boiled eggs when they're still hot. Let pickle in the sealed jar in a cool dark place for at least 5 days for best flavor. The longer the better.

Wednesday, April 2, 2008

GOTTA GIVE THE PEEPS WHAT THEY NEED - EASTER 2008 MENU


I admit that I've been fairly lax with posting lately, but it's been a busy couple of months. There were many reasons, the biggest being that I was on the road working for a good period and we hosted my in-laws for 2 months; which I was initially trepidacious of, because our house is so small, but in the end it turned out to be very enjoyable. Regardless of those things, there still has been a lot of cooking and eating, though very little in the writing department. Hopefully, that changes, starting now. I'll keep it simple this time.

We hosted 21 people for our annual Easter dinner this year. This year's menu turned out fantastic and there really wasn't a lackluster dish in the bunch. It was a diverse and eclectic potluck menu to say the least. The menu had a decent amount of Russian / Czech Influence, followed by English, American Southern, French, and some California Modern. Oh, and some delicious Margaritas. Thanks to everyone who helped to make it such a great day and wonderful meal. Onto the food...


THE MENU (recipes to follow if not already linked)

appetizers


Hot Pepper Pickled Eggs & Pickled Beets with Red Eggs served on pretzel sticks (see my next post for the egg recipes)

Prather Ranch Whiskey Sage Sausages with hot mustard

Easter Bread - Pascha (we add white raisins)

Homemade Pumpernickel Bread

Biscuits and Honey Butter


Main Course


Rotisserie Jamison Farm Leg of Lamb with Oil-Cured Black Olives and Herbs

Fresh Baked Ham with Whisky and Cola Glaze

Hrin

French Potato Salad


Easter Cheese - Cirok

Minty Mushy Peas

Carrots with Ginger

Fresh Garden Arugula & Baby Lettuce Salad with Shaved Fennel and Green Garlic with Lemon and Olive Oil (pick the arugula, baby lettuce, fennel, and green garlic. Shave the fennel and green garlic. Toss with lemon juice and nice virgin olive oil)


Dessert


Brown Sugar Almond Lemon Cake with Creme Fraiche and Fresh Berries

Coconut Cupcakes

Classic Margaritas


THE REST OF THE RECIPES

Rotisserie Leg of Jamison Farm Lamb with Oil-Cured Black Olives and Herbs
adapted from The Santa Monica Farmers' Market Cookbook by Amelia Saltsman

1 semi-boneless leg of lamb, 7lb
7 cloves garlic, peeled, plus 8 cloves for the pan
1.5 tsp kosher salt
1 cup pitted oil-cured black olives
1/2 cup fresh Italian parsley leaves, coarsely chopped
1/8 cup fresh mint leaves, coarsely chopped
1/8 cup fresh thyme leaves, coarsely chopped
1/4 cup fresh rosemary leaves, finely chopped, plus sprigs for pan
1/2 cup olive oil
Freshly ground black pepper
2 bottles dry white wine
1 cup chicken stock

Cut 12 or more slashes, each 1 to 2 inches deep and 2 inches long, in the leg of lamb, spacing them evenly. With a mortar and pestle, mash the garlic with the salt. Add the olives and herbs in batches, adding a little olive oil with each addition (using up to 1/4 cup total), and mash to make a textured paste. Stuff the olive-garlic paste into the slashes, and don't worry about being too neat. Rub the remaining 1/4 cup olive oil over the lamb and season with pepper. Cover and let rest in the refrigerator up to 6 hours. Bring to room temp before cooking.

If using a gas grill with rotisserie burner, turn on two of the burners to low and turn the rotisserie burner to high. Preheat the grill with the lid down. I remove the grates from my grill and set a stainless steel food-service rectangular pan on top of the burner heat dispensers. I have a 3 burner grill. I have the two outside burners on low and the middle burner off. I fill the pan with the two bottles of white wine, chicken stock, garlic, and leftover herbs. The pan will act in two ways; it will keep the air moist while the lid is closed and it will catch the drippings from the lamb. Skewer the lamb onto the rod along the bone and then tie the lamb leg with kitchen twine like you tie a roast. Add the end prongs and secure the lamb to the rod securely. Put the lamb and the rod onto the rotisserie unit over the pan and adjust it for balance. Cook the lamb with the lid down approximately 20 minutes per pound or until a meat thermometer inserted into the thickest part of the leg (not touching bone) reads 120 for rare and 140 degrees for medium. (The temperature will continue to rise a few degrees outside the oven.) Remove the meat from the grill, cover on a platter with foil and let rest for about 20 minutes before serving. In the meantime, take the drippings and stock-wine mixture off the grill and transfer to a pan. Reduce on a stovetop over medium heat till slightly thickened. Season with salt and pepper and add a pat or two of butter (add any juices from the lamb platter just before you carve the meat as well). Transfer to a warm serving bowl. Remove the lamb leg from the skewer and carve the leg into long thin slices with the grain, parallel to the bone. Serve with the sauce.


Hrin

2 cups pickled beets from the pickled beets and red eggs - ground in food processor
mix with
1 cup of horseradish
1/4 cup brown sugar
1/4 cup white vinegar
put in jar and store in the refrigerator. Bring to room temp to serve as a condiment.


Gingered Carrots

2 pounds baby carrots
1 cup orange juice
1/4 cup butter (1/2 stick)
2 tablespoons sugar
1-1/2 tablespoons fresh, peeled, grated ginger
Salt and pepper
2 tablespoons chopped fresh parsley

Place carrots, juice, butter, sugar and ginger in skillet over medium-high heat. Bring to boil. Cover and cook 3 minutes. Uncover and simmer about 10 minutes or until liquid glazes the carrots. Season with salt and pepper to taste. Sprinkle with chopped parsley before serving.


Classic Margarita

1 1/2oz (1 Jigger) Cazadores Reposada, Corzo Reposada, or Don Julio Blanco (Whatever Tequila you really like - don't waste money on Anejo - you need something with more oomph to stand up against the lime)
1 1/2oz Cointreau
juice of 1/2 - 1 lime (depending on how tart you like it)
Margarita salt

Put ice in a cocktail shaker and combine the tequila, cointreau, and lime juice. Shake a couple seconds and then pour into your favorite ice-filled glass. If you like the rim of your glass with salt, take one of the lime halves and run it around the rim and then dip the rim in a plate of the salt.

Note or suggestion: I prefer my margaritas tart and smoky. To accomplish this, either go for the whole lime or back off on the cointreau. For the smoky, I add a floater (1/2 - whole shot) of really good Mezcal. I love Del Maguey's Chichicapa. If you can find it, it's fantastic - but really expensive. It adds an amazingly delicious smokiness to it. I also mix some ground chile powder into my salt to rim the glass.

Monday, March 3, 2008

GARDENING AT NIGHT: KALE AND OYSTER MUSHROOMS WITH CREAMY POLENTA


I'm slowly trying to catch up on my posts after being out of town for 3 weeks working, so I'm sorry if you've been checking for something new to no avail. I currently have 2 countertop mushroom logs growing amazing Tree-Oyster mushrooms. One is mine, and the other is a friend's that I'm babysitting while he's out of town. Lucky me. Double the harvest of mushrooms. I also had a shiitake mushroom log, which grew some incredible fungus, but one of my cats knocked it off the counter and the log never recovered. It was good while it lasted, though. My wife and I couldn't believe the flavor of the shiitakes fresh off the log. There really isn't any comparison to store bought. We used them in a simple Japanese Nabe with fresh vegetables, tofu and Konnyaku. All three of the logs were obtained from a great mushroom shop, Far West Fungi, that's in San Francisco's foodie haven, The Ferry Building Marketplace. They were each around $28 including shipping to Los Angeles (I think they were $19 without shipping). The logs are made of compressed sawdust that is inoculated with mushroom spores. The log lives in a big clear plastic bag and the care is as easy as opening the bag various amounts throughout the growth process and occasionally misting water to maintain a properly humid environment. With proper care the logs should provide you with 6 or more crops (with dormant periods in-between). The two Tree-Oyster logs recently provided us with a harvest of 7 delectable ounces. Those were put to good use in a highly recommended recipe I found in February 2006's Bon Appétit magazine.


KALE AND OYSTER MUSHROOMS WITH CREAMY POLENTA
adapted from Bon Appétit, February 2006

1 bunch kale, stemmed, cut into 1-inch pieces

4 cups whole milk
3 1/2 cups water
2 cups polenta
1/2 teaspoon salt
3/4 teaspoon ground black pepper

4 ounces pancetta (Italian bacon), coarsely chopped
7 ounces oyster mushrooms, sliced
4 tablespoons extra-virgin olive oil, divided
1 garlic clove, minced
1/2 cup low-salt chicken broth
2 tablespoons chopped fresh thyme
1 tablespoon grated lemon peel

4 tablespoons unsalted butter
1 cup freshly grated Parmesan cheese

Cook kale in large pot of boiling salted water until tender, about 6 minutes. Drain.

Bring milk, water, polenta, salt, and pepper to boil in heavy large saucepan over medium heat, whisking constantly. Reduce heat to low and simmer until thick, stirring occasionally, about 20 minutes. Remove from heat.

Meanwhile, cook pancetta in heavy large skillet over medium-high heat until golden brown, about 3 minutes. Using slotted spoon, transfer pancetta to paper towels. Add mushrooms and 2 tablespoons oil to drippings in skillet. Sauté until mushrooms are tender, about 6 minutes. Stir in kale and pancetta. Add garlic and broth; simmer until broth is slightly reduced, about 6 minutes. Stir in thyme, lemon peel, and 2 tablespoons oil. Season to taste with salt and pepper.

Whisk butter and Parmesan into polenta and divide among plates. Top with kale mixture.

Monday, January 28, 2008

BEER SNACK - JAMBON DE PARIS, PROSCIUTTO, AND ANCHOVY SANDWICH


Busy with work, I was looking for something simple to make, yet full of interesting flavors, not too heavy, and would go well with a nice bottle of Lagunitas Maximus beer. A friend of mine had read my post recommending cookbooks for the holiday season and he brought up a book I had perused but hadn't purchased, Stephane Reynaud's, "Pork & Sons". I picked up the book over the holidays and fell fast for it. Reynaud educates the reader on the annual tradition of the pig kill in France. The book is filled with beautifully photographed food and interesting and entertaining musings on the rich history of this rustic tradition. The book covers the pig nose to tail and like another book close to my heart, Martin Picard's, "Au Pied De Cochon - The Album," it demonstrates a deep respect for the animals and how they are raised through the methods of their slaughter. It's basically a celebration of all things porcine, containing recipes that act more as guide than ones set in stone, allowing room for improvisation and substitution. There are recipes ranging from sausages, charcuterie, roasts, salads, and a great section on offal, which most Americans are averse to, yet we should learn to appreciate more out of respect to the animals that we eat. Waste not, want not.


While flipping through the book, a recipe caught my eye immediately, a sandwich layered with ham, prosciutto, anchovies, sun-dried tomatoes and black olive tapenade tucked between two toasted slices of crustless white bread. I'm a sucker for anchovies, so I had to make this sandwich. They add such a nice touch when combined with certain meats, but that's for another time. My bottle of beer had found its companion.


I adapted Reynaud's recipe for two people and made some small changes. It calls for Jambon de Paris, which I couldn't procure without driving all around the city, so I used some wet-cured, unsmoked sliced ham. Plus, I am trying to buy locally produced meats as much as possible. Jambon de Paris is basically the square loaf fully-cooked sandwich ham that most American kids were familiar with, but of a higher quality. (Much the same as Chipped Ham, for those of you from the Pittsburgh area, yet sliced thicker) There are local producers, but it's not something widely available, but almost any good quality sliced ham could be substituted. Another thing I changed was to use shallots instead of onions. That was just a personal preference. In addition, I used some really nice oven-roasted tomatoes I had in the fridge instead of the sun-dried ones in the original recipe. Sun-dried would work as well. The recipe has instructions for a quick tapenade without anchovies, but in the name of ease, I used a jarred tapenade that I had on hand. Good olive tapenades are so easy to find nowadays and so useful, I always seem to have a jar in the fridge or pantry. I used some nice salt packed anchovies from the deli section at our Whole Foods. For prosciutto, I used the buttery luscious, La Quercia Rossa - Heirloom Breed Culaccia. The La Quercia Prosciutto Americano is amazing and would work just as well. La Quercia is a small earth-friendly artisan meat company located in Iowa. They use humanely raised animals and cure using traditional methods instead of using nitrates, nitrites or vegetable derived substitutes. I highly recommend searching out their products and supporting this great company.

I've been a big fan of the Northern California, Lagunitas Brewing Company for a long time. Their Maximus is one of my favorites. They describe it as an "IPA Maximus," but it probably falls more into the somewhat disliked label of "Extreme Beer" than an IPA. I'm going to call it a Double IPA, because at 7.5% abv, I feel it's a little low in alcohol to call it an Imperial IPA or Triple IPA. I guess Extreme Beer is just as easy a name because it's simpler to remember and it seems to encompass all those other labels. Maximus is very aggressively hopped, so, it's not for the faint of hops. It wears it's bitterness like a badge of honor. Surprisingly, it maintains a shimmer of a malt balance, though the piney and grapefruity hops keep lingering on. There is definitely some nice sweetness that comes out as the beer warms a bit. Not a beer for everyone, but that's okay. That's what makes life fun. We're all different. Plus, there'll be more for me.


A perfect light fulfilling dinner or an elegant beer snack. However you may look at it.

Jambon de Paris, Prosciutto, Anchovy Sandwich
adapted from "Pork & Sons" by Stephane Reynaud
makes 1 (easy to figure out how to make more)

2 slices white bread with crusts cut off
1 jar black olive tapenade
2 thin slices prosciutto - cut into strips
1-2 slices jambon de paris (basically, unsmoked ham, sandwich ham) - any kind of wet cured will work.
oven roasted tomatoes or sun dried tomatoes cut into strips
2 salt packed anchovies (much better than using oil packed)
1 shallot sliced into rings and separated

Pan fry the shallots in butter or olive oil. Don't let them burn or they'll become bitter. Slowly fry them till their golden. Remove them from pan onto paper towel to drain. Toast the bread. Spread tapenade on one side of each slice. Layer the ham strips on top, then the prosciutto, tomatoes, fried shallots, anchovies and finally the other slice of toast.

Friday, January 11, 2008

A THURSDAY'S SUNDAY SUPPER OF SAUTEED HALIBUT WITH ARUGULA, ROASTED BEETS, AND HORSERADISH CREME FRAICHE

Long time no post. The holidays got in the way to say the least. That and the fact that I was under the weather most of the time. I did get to do my fair share of food blog and cookbook reading, though. My wife and I visited family in Pennsylvania and I did close to no cooking the entire 18 days we were away, with the exception of eggs with pickled peppers and lots of impromptu sandwich creations. Upon return to Southern California, I wanted to cook, but I didn't have the stamina to cook anything slightly connected to the cold rainy weather we were having. This because I was still recovering from the holiday heavy food bludgeoning we had endured. Both my wife and my families live in the same town, so we split time between them during our annual holiday trip. The result of this is us eating 2 Christmas and 2 New Year's dinners. Actually, we couldn't possibly eat anymore on New Year's, so we saved our plates for breakfast the next day. Double family meals, holiday parties, restaurant dinners, lamb roast, Pittsburgh Italian sausage, Primanti Brothers sandwich, espressos, cookies, biscotti, artisan made schinken, bathtub Slivovitz, holiday release beers, and my achilles heel, homemade Chex Mix.... I'm sure you get the idea.

I digress. What to cook? I searched through cookbooks and landed on of all things, Suzanne Goin's terrific, Sunday Suppers at Lucques. I say "of all things", because I usually consider these recipes to be very rich and not afraid of olive oil, butter and exactly what I wasn't looking for. Her decadent Pork burger recipe almost killed me. Regardless, I found a clean sounding recipe for Halibut, despite the horseradish cream. It was a delicious first cooking experience of the year (not counting our normal salads from our garden and brussels sprouts with pancetta I made the night before this fish, also from Sunday Suppers - fantastic recipe).


I used amazing golden beets from our local farmers' market. The beet recipe alone would make a delicious salad with the addition of some arugula or other spicy green. Keep a close eye on the fish. Overcooking it will ruin the dish and it can happen on you very quickly. Better to take it off a little too soon and then deal with it (it'll keep cooking for a few minutes from it's own heat) rather than too long and barely being able to swallow it down without the aid of liquid.

I adapted this recipe for 2 people. The unadapted recipe can be found here.

Sautéed Halibut with Arugula, Roasted Beets, and Horseradish Crème Fraîche
Adapted from Sunday Suppers at Lucques by Suzanne Goin

2 halibut fillets, 5 to 6 ounces each
1/2 lemon, zested
1/2 tablespoon thyme leaves
1 tablespoons chopped flat-leaf parsley
1 tablespoons extra-virgin olive oil
1 bunch arugula, cleaned
Roasted beets with horseradish crème fraîche (see below)
1/2 to 1 tablespoons super-good extra-virgin olive oil, for drizzling
Kosher salt and freshly ground black pepper

Sprinkle the fish all over with the lemon zest, thyme and parsley. Cover in the refrigerator overnight.

Bring the fish to room temperature before cooking - about 15-20mins depending on how cold your fish was and how cold your house is. Ours is freezing right now.

Preheat a large sauté pan over high heat for 2 minutes (non-stick would be good with the fish). Salt and pepper both sides of fish to your liking. Add about 1-2 tablespoons of the extra-virgin olive oil into the pan and wait about a minute. Add the fish carefully to the pan, and cook about 3 minutes. It should be lightly browned. Turn the fish over, and cook at medium-low for about 2 more minutes. As usual with fish such as Halibut, be careful not to overcook. It can change on you very fast. You'll know it's done when the fish will start to flake a little. You want the center to still look slightly undercooked because it will cook a bit on it's own as it rests while you finish assembling the last part of the dish.

Scatter half of the arugula over a large platter. Scatter the beets on top of the arugula and drizzle with half the horseradish cream. Place the remaining arugula in between the beets. Place the fish on top of the salad, and spoon a little horseradish cream over each piece. Lightly drizzle lemon and the good olive oil over the whole dish.


Roasted Beets with Horseradish Crème Fraîche

1 bunch fresh whole beets (I used golden beets)
1/4 cup plus 1 tablespoons extra-virgin olive oil
1/2 tablespoon diced shallot, plus 1/8 cup sliced shallots
1/2 tablespoon plus 1/2 teaspoon balsamic vinegar
1 tablespoon red wine vinegar
1 1/2 teaspoons lemon juice
1/2 cup creme fraiche
1 tablespoon prepared horseradish
1/4 cup goat's milk yogurt or plain yogurt from the animal of your preference
Sea salt and freshly ground black pepper

Preheat your oven to 400°F.
Trim the beets, leaving about 1/2 inch of the stems still attached. Clean the beets well. Toss them with 1 tablespoon olive oil and 1/2 teaspoon salt.

Put the beets in a Dutch Oven (I used a 5.5qt) with a bit of water in the bottom. Put the lid on the Dutch oven, and roast for about 40-45 minutes, until they’re tender when you pierce them. When they're done, let them cool, and peel them. You use your fingers to slip off the skin. Cut them into 1/2-inch-thick wedges.

While the beets are in the oven, mix together the diced shallot, both vinegars, 1 teaspoons lemon juice, and 1/8 teaspoon salt in a small bowl. Let the flavors combine for about 5 minutes. Then whisk in the 1/4 cup olive oil. Season to taste.

Make the horseradish creme fraiche. This recipe is for the whole 6 portion recipe. I knew I would find a use for the extra. You could make less, but Bellwether Creme Fraiche comes in 8oz containers, so that would be a waste. (this stuff would be great on a cold roast beef sandwich or steak sandwich with some shallots pickled in red wine). Whisk the crème fraîche and horseradish together in a small bowl. Stir in the yogurt (she uses heavy cream - I thought the whole thing was already rich enough), remaining 1/2 teaspoon lemon juice, 1/8 teaspoon salt, and a pinch of pepper.

Toss the beets and sliced shallots with the vinaigrette. Season with salt and pepper to taste.